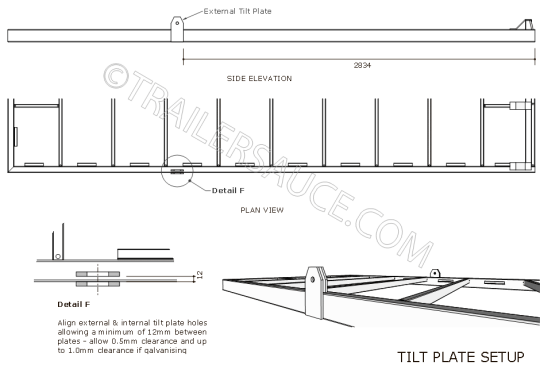
Measure out the position for the tilt plates, square and clamp the external tilt plates to the chassis rail and tack weld into position.
Place a 12.5 - 13mm packer between the external and internal tilt plates, fit a bolt to align the hole and tack weld the internal plate to the chassis rail. Do not fully weld until the drawbar has been fitted and its tilting operation checked.
Put the drawbar sections together making sure that the shackle holes are on the outside faces. Fit the hinge plates to the opposite end, opposing each other and tack weld onto the drawbar sections.
Lay the drawbar sections down the centre of the chassis and swing the hinge end around to the tilt plates and bolt together.
Bring the other two ends of the drawbar together, align top and bottom and the inside edges together and tack weld.
Check the alignment of the drawbar by measuring from a common point on the end of the drawbar back to a point on the chassis. Repeat the measurement on the other side of the drawbar.
If the measurements are not identical, there may be some misalignment with the hinge or tilt plates. Double check all measurements and for any discrepancies. Break the welds and adjust as needed.
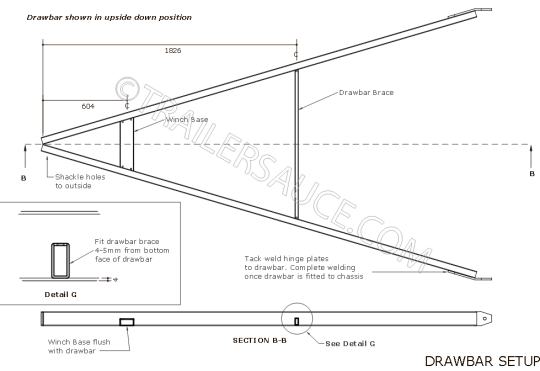
When the drawbar has been aligned, clamp the drawbar sections to the front chassis crossmember and fit the winch base and drawbar brace as shown.